This winter my older girls decided that they wanted to raise chickens for real. We had dabbled in raising chickens for laying eggs the year before and had a small 4-6 chicken coop and really enjoyed all the eggs that we got. We also love that my oldest (9 years old) takes care of the chickens almost exclusively. I don't have to worry too much about them except to remind her to feed/water them when she is doing her chores. She has done an amazing job taking care of her pets. So, when she asked if she could get more chickens and sell the eggs, we didn't hesitate.
The only problem, was that every coop that was large enough to fit as many chickens as we were planning on, cost a fortune. Definitely not worth it.
So, this is how we built our chicken coop from scraps of wood we had, 4x8 flat pallets that my Father in Law found at work that they no longer needed, and many trips to the store.
I need to make something clear before I really jump in. Throughout this post I will probably say "we" or "I". I just want to make sure you all know that when I say that, I really mean my husband and my Father in Law most of the time. I was definitely there with moral support, or helping hold this or that. I did paint most of it, but in reality, my building skills are pretty primitive. Honestly, I didn't care too much about what it looked like, except I didn't want it to be an eye sore.
This coop is far from an eye sore! It is so beautiful, and my girls are jealous a wee bit of the chickens, because they would love to have this as a playhouse for them. Maybe. Someday. They might talk their Grandpa and Dad into repeating the process. Maybe
We started out by building a base. My husband was very insistent on having the coop off the ground. It provides the chickens with some shade, and keeps rodents out. Hopefully. He use pre treated 4x4's so that we don't have to worry about the wood rotting or having to paint it.
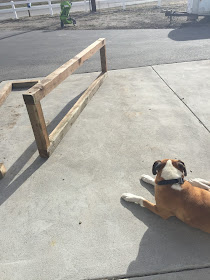 |
| Our trusty ol' boxer overseeing the project. Kinda...She's a little blind. So we don't trust her with decisions. |
Next using 3 of the pallets (aren't those things A-MAZ-ING?!), we laid them out and fastened them to the base.
Looking Good!
The opposite end from the braces is the beginning of the nesting boxes will be.
This is the end with the nesting boxes for the chicken coop. Still need to do a bit more of the framing and then make the doors.
The wall where the little chicken door will be for the chickens to go the run. We hadn't cut the hole yet for that at this point.
At this point we had bought our new chicks. We plan on having 14 chickens in this coop at 1 time. Every year we plan on buying 7-9 chicks and then rotating the old ones out.
Our Boxer pup was VERY interested in those little boxes. She is a curious soul...That girl!
Next we finished all the framing for the coop, and then cut holes for all the different parts that needed to be added. That included a vent, the window, the shingled roof, and all the doors door.
We also did some trim to jazz it up a bit. It wasn't necessary, but man it sure makes it look good!
They also had built:
- the man door complete with decorative hinges and a latch with handle
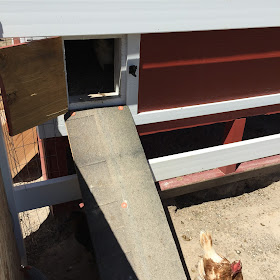
- The small chicken door with a latch and a small hinge
- the nesting box door with a piano hinge and matching latch to the man door.
The plywood across the bottom where the stairs are was put there for stability. Plus it helped to have something to attach the stairs too.
Next, we painted. A little note that might help someone else. Home Depot, Lowes, and even Amazon carry barn paint. It is already tinted (factory tinting is awesome) It only took 2 coats of paint which is AMAZING for red paint. Red paint tends to be very transparent and can take 10-12 coats sometimes. Ask me how I know. Long Story!
We also used the white outdoor barn paint for all the trim
Plus, this barn paint is animal friendly. Win-Win.
Next we had to build the run. We planned on making it big, but we needed a decent fence to go around. Sadly, I didn't get many pictures of this part. The only picture I have is when I was feeding the baby on the other side of the vinyl fence while watching my husband dig holes in rocky ground and then cement the 4x4's into the ground.
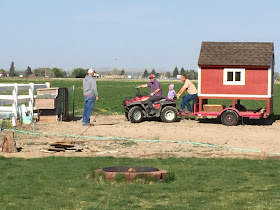
Then came the dreaded day, of moving the chicken coop from my inlaws house (we live next door) to our house. This coop is big, its heavy, and I didn't know how they were going to move that beast of a building
My Father in law had a plan. It might not have been the safest plan, but it was a plan. So we jacked it up onto the little trailer and pulled it right on over to our house. Do you see the teeny-tiny little coop that we had bought from Cal-Ranch the year before next to the fence. yeah..The new one is HUGE!
Moving the coop was definitely a family affair. We all helped (even our uncle stopped by)
Now its been a month or so since we placed the coop. We still love it. The chickens REALLY love it. Everybody is happy.
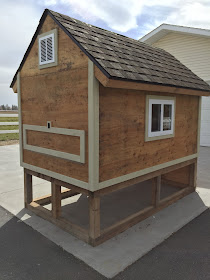
Here is all finished:
 |
| Man Door for the Pallet Chicken Coop |
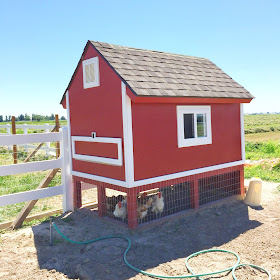 |
| Happy Chickens in their coop |
So instead, we build this large fenced in area. Its pretty big and it gives the chickens plenty of space to enjoy themselves. And we don't have to worry about the local predators eating our chickens.
 |
| Kinda...Free Range Chicken Run. |
One side of the chicken run
More of the chicken run
We are still working on making a 5 gallon bucket water for the chickens. This one doesn't last long enough and my daughter has a hard time making sure it was all the way full. Always something to do, right?!
*Note-7 years later. Our flock has grown to 35 chickens this year (way too many for this size of coop) but the waterer that we really like for this large of a flock is pictured below. It is not messy and it holds a LOT of water. Win-Win.
Also love it for easy fill up. No more twisting the bucket off the base and trying to flip it over. Leveling the waterer so that it didn't constantly drain. Let me just say, that part of chickens hasn't been fun to try to figure out. But I think we've landed on this one as being the easiest
I hope you enjoyed seeing the process of how we built our chicken coop. It really was a fun experience, most of the time. I learned a lot about building and can't wait til I am able to talk my husband into making a matching tool shed and playhouse for the kiddos. Wish me luck! {lol}







9 comments:
So cute. I sure hope Dad and Grandpa make the playhouse for the kids!
Here from Inspire Me Monday.
I love your new chicken coup - the red color is perfect and the fact that you built it out of pallets is awesome. Thank you for sharing it with Share It One More Time. Cathy
Looks awesome!! I'll have to pin this for "someday!"
Love it! You guys did a fantastic job!
Thanks for sharing with us at Brag About It!
~Laurie
What a great coop! A terrific job - so professional. I don't know the weather in your area, but at some point you may wish to add more ventilation. From what I read ventilation is key to a chickens health. Chickens can handle the cold but the heat and humidity....not so much. We have hardware cloth ventilation on all four side of our coop plus a removable top at our peaked roofline. Our girls sleep with the screens open every night here. Even in the wintertime with 6 feet of snow on the ground, I monitor the humidity in our coop and open windows for them to bring the high humidity down. Donna at The Small House Homestead/SW Michigan.
Your chicken coop looks great! Very creative to use the pallets.
Annamaria
Okay, this is so tempting to try while we are on an extended stay with my in-laws on their 20 acres. I LOVE it! It looks great and I love the idea of having chickens. Of course, like you, it would mostly be my husband and father in-law doing the work so I guess I would need to run it by them! I'll be pinning to my outdoor projects board just in case I get a yes from the guys...Thank you for sharing with us at the #HomeMattersParty this week! Hope to see you again next week.
Your pup is absolutely adorable!
And the coop is fancy! Love the 'barn' look :)
Your post has been featured :)
http://milaslittlethings.com/2015/07/idea-box-thursday-link-party-18.html
xx
Mila
Never thought I'd say "It is beautiful" about a chicken coop! You guys did a great job
Post a Comment
I love hearing from you! Let me know what you think