

I am a summer fanatic all...the...way. I love summer. I hate being cold.
But this quilt almost makes me like fall and winter. Almost.

Fall colors. Scrappy style.
A couple months ago I had every intention of writing a little tutorial on how I did this rag quilt, but then my phone crashed and I lost every single picture that hadn't synced with my Ipad.
So, you will just get the written version. Sorry! No pictures.
I took 2.5 inch pieces of all different lengths and sewed them into a square similar to how you would do a long cabin.
 I made 2 really large blocks. They measured about 44 inches square.
A couple months ago I had every intention of writing a little tutorial on how I did this rag quilt, but then my phone crashed and I lost every single picture that hadn't synced with my Ipad.
So, you will just get the written version. Sorry! No pictures.
I took 2.5 inch pieces of all different lengths and sewed them into a square similar to how you would do a long cabin.

Now take one of those blocks and fold it into a triangle, taking the bottom right hand point and lining it up with the top left hand point. Then cut that into 5 inch strips.

You will need to piece some of those 5 inch strips together to get about 44 inches in width. You can see in the picture above in the 3rd row down there is the brown polka dot fabric and how there is a straight line instead of the blocks building on each other. That one was pieced.
Cut all your strips into 44 inches wide (or the width that you would like for the quilt)
Cut out the same number of 5 inch strips from your flannel backing fabric.
Now layer your pieced pieces for your top with the flannel on the back. Take 2 of your layer pieces and with the flannel pieces touching and your top quilt pieces on the top and bottom facing outwards, sew down the long side with a 1/2 inch seam allowance.
Repeat with the remaining pieces.
Clip the seam allowance with short blade scissors (Here is a great blog post if you would like more info on which scissors are the best)
Wash and dry your quilt. Make sure to check your lint catcher in your dryer a couple times while it is drying.
Enjoy your new rag quilt!

Did you enjoy this tutorial? Find more on my blog and in my Etsy Shop
Or sign up to receive more awesome tutorials in your email
If you enjoyed this quilt tutorial you may also like these patterns:
Cut all your strips into 44 inches wide (or the width that you would like for the quilt)
Cut out the same number of 5 inch strips from your flannel backing fabric.
Now layer your pieced pieces for your top with the flannel on the back. Take 2 of your layer pieces and with the flannel pieces touching and your top quilt pieces on the top and bottom facing outwards, sew down the long side with a 1/2 inch seam allowance.
Repeat with the remaining pieces.
Clip the seam allowance with short blade scissors (Here is a great blog post if you would like more info on which scissors are the best)
Wash and dry your quilt. Make sure to check your lint catcher in your dryer a couple times while it is drying.
Enjoy your new rag quilt!
Did you enjoy this tutorial? Find more on my blog and in my Etsy Shop
Or sign up to receive more awesome tutorials in your email
If you enjoyed this quilt tutorial you may also like these patterns:
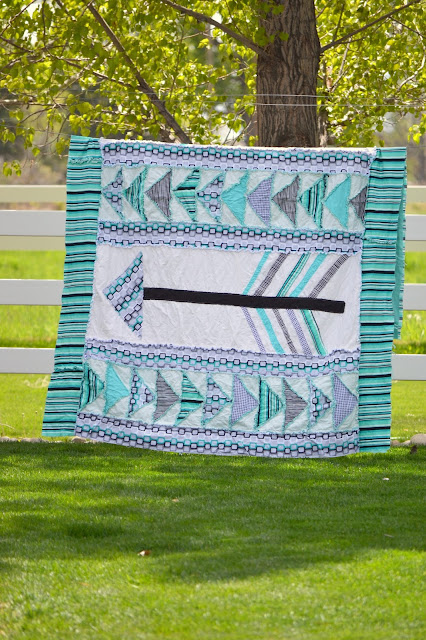 |
| Arrow Rag Quilt Pattern |
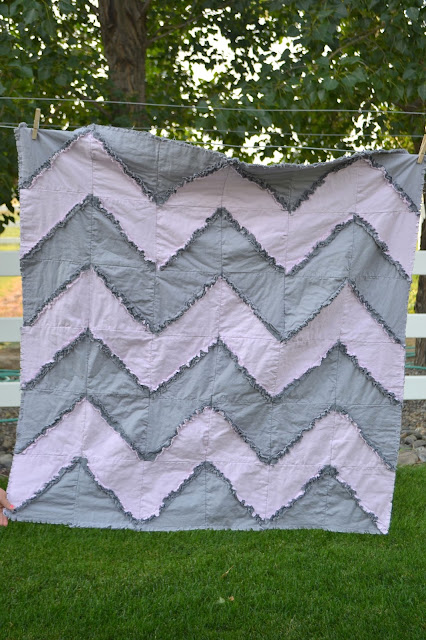 |
| Free Chevron Rag Quilt Pattern |
 |
| Lexi Lou Rag Purse Pattern |

.png)