Turquoise and Burlap Ribbon Wreath: A Vision to Remember Instagram feed

Seriously, I am the worst at making sure I have a wreath on my door. I didn't take my one down from Christmas until after Valentines day. A red wreath totally works for both holidays right?!?
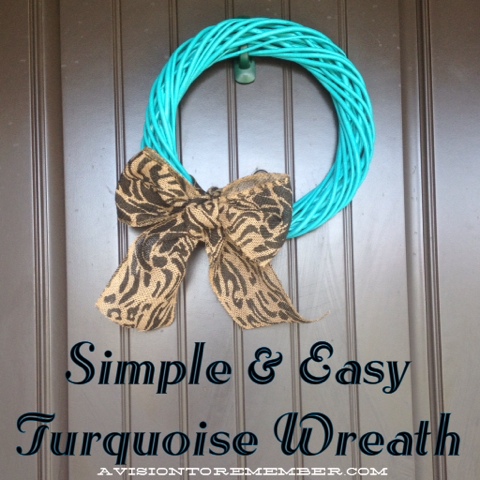
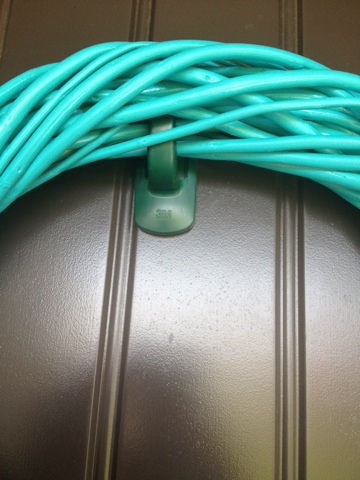
turquoise and burlap wooden wreath


Finally added a wreath to my front door after not having one since Christmas. Love that it is #simple. If it was anything complicated it wouldn't of happened.

For this simple wreath I spray painted a wooden wreath that I found at +Deseret Industries for a couple bucks.  

turquoise and burlap wooden wreath


Then I used some burlap printed ribbon and tied a simple bow.  Voila.  A simple, easy, and quick wreath.  Plus it was cheap.  Win...Win!


DIY Old Cabinet Door Upcycle to Family Room Wall Art Plus a Giveaway

I found this old cabinet door at the local Thrift Store +Deseret Industries a couple years ago.  I knew that I wanted to turn it into some kind of wall art.  So while I was painting I painted it orange.  Then I set it aside and found it a few months ago.  Have you ever done that?!?  Seriously,  sometimes I wonder if I will ever get all my projects done that I have already started on....

DIY Old Cabinet Door Upcycle to Family Room Wall Art

So I whipped out my mom's trusty ol +Silhouette America and found this this silhouette file to cut out the words.  For the turquoise top and bottom I used a design call "swirl" but I couldn't find the link to it...Sorry!

The Vinyl Colors that I used came from +Expressions Vinyl.  The gray is the medium gray interior color and then turquoise blue for the Scroll


DIY Old Cabinet Door Upcycle to Family Room Wall Art 

I ran into a couple problems while I was working on the vinyl part of this project.  First off, the transfer paper that I have was REALLY sticky (I bought it off of Ebay).  It didn't want to let go of the vinyl.  At first I thought that the vinyl wasn't sticky enough, but that wasn't the case.  

I recut the vinyl a second time, but this time I used Press and Seal instead of the transfer tape and it worked perfectly!  

I had also asked a few of my buddies over on Instagram and Facebook what they would recommend trying and most everyone said to do a layer of modge podge and then try adhering the vinyl.  I didn't work for me, but I think it would if your transfer tape isn't super sticky.  


I can't wait to get this beauty hung up next to my Clock in the next week or so.  I just need to find something to put on the other side of the clock opposite of this.  Any ideas?

 
DIY Old Cabinet Door Upcycle to Family Room Wall Art

Make sure to enter the giveaway below so that you have a chance to win $25 gift card to ExpressionsVinyl.com 

Also, you all get a nice little coupon code if you would like to go purchase some of this awesome vinyl from Expressions Vinyl.  It is avisiontoremember. 
Follow on Bloglovin


a Rafflecopter giveaway

Delilah Shirt Pattern Turned Maternity Shirt

Today I am participating in the Golden Rippy Delilah Shirt Blog Tour.  I was so excited to give this shirt a try because it looked roomy enough that I could use it as a maternity shirt.  I had my fingers crossed that it would work out and it did!

First off, a little about this pattern from my experience:
1. It was a quick sew.  It seriously only took me 1 hour to sew the shirt from start to finish.  That included me trying it on several times while sewing it to make sure it was going to work with a big ol belly

2.  I used my serger instead of sewing machine for assembling the shirt, except for the top stitching I did with my sewing machine.

3.  I originally cut out a medium, but then after fitting the first time I realized that it was WAY to baggy for my top and under my belly.  So ended up taking in under the arms and the waistband a couple of inches each.  I didn't compare it for sure, but I think they ended up being closer to an x-small in those areas.

4.  I am always intimidated by adding the arm and neckline binding. I am always afraid that I am going to stretch the fabric too much, or not enough, but it turned out perfect.  There wasn't any funky parts to it at all.  Much to my relief!

5.  I made my shirt using +Riley Blake Gray Chevron Knit fabric.  It is so soft and comfy.  The best part is that it isn't a thin knit like a lot that you find around town and online.  Plus it has a ton of stretch to it.
A Few details from the designer:


Golden Rippy Patterns- Delilah Top for Ladies
The DELILAH top is a fun beginner knit top with half sleeves or short sleeves built in. The arm and hip bands can be made in a contrasting fabric for more fun. The drop sleeves and roomy fit mean that it’s super comfortable! You can make a pretty bow or choose to add some flowers. Get ready to make a closet full of them!
And if your little girl wants to match mommy, you can make her the matching Dahlia top in her size.
Includes:
  • illustrated instructions
  • six sizes  XXS to XL
  • 2 sleeve lengths
  • 2 embellishment options
  • printing guide
  • pattern layout guide
  • grainlines
  • 28 page PDF pattern download to make the top
  • fabric yardages for 45″ and 60″ widths
  • pattern pieces with seam allowances
  • professionally designed and graded pattern


Now make sure to enter in the Rafflecopter Giveaway below for your chance to win this (or any other pattern from Golden Rippy)+


Prize Package
Two winners will each win: 2 Patterns of your choice from Golden Rippy

The Contest Rules:
You must be 18 to enter.
You can gain entries by entering the Rafflecopter Prompts.
Giveaway ends: 8/6/14 at midnight PST.
Two winners will be chosen and announced on 8/7/14.

If you want to see what everyone else has done with the Delilah Shirt Pattern make sure to stop by Golden Rippy Blog to follow along the next 2 weeks!


Follow on Bloglovin


a Rafflecopter giveaway

Herringbone Sling Bag Sewing Pattern

The herringbone sling bag sewing pattern is now available at A Vision to Remember


I absolutely love how it turned out and so do my girls. They barely put their bags down. 


My favorite part is this little girl wanting to "model" her bag for me.  She is such a crack up! 


Follow on Bloglovin

10+ Summer Free Printables Roundup plus The Creative Exchange Link Party Highlights

A huge thanks to everyone that stopped by this weeks The Creative Exchange Link Party. There were so many great links it was hard to choose which were my favorite. This week I was really inspired by all the summer inspired printables.

10+ summertime inspired printables


 So I thought I would summarize the party with a few printables:

Time for Season shares her Personal Camp Packing List:
personal packing list for camping

The Hedgehodge Life shares an Illinois state inspired printable (for those family vacations and reunions "back home")  I so wish that there was one for Idaho!
illinois state printable


For those summer time birthdays that I never seem to have enough time to get a gift put together for by LizonCall
birthday note card for a quick gift printable

This printable is great for teaching your kids during the summer how to help with laundry (one of my most hated chores!)  Great way to incorporate making your life easier and summer chores by The Happy Scraps
Get the laundry done printable

A great Sewing Bingo game for your Local Quilt Guild Summer time get together by Patchworkposse
printable sewing bingo game

A fun Summer Reading Checklist by Tips from a Typical Mom so your kids don't fall off the reading wagon this summer

A fun Chalkboard inspired summertime printable by Before the Clock Strikes Midnight
summertime chalkboard printable

This one isn't necessarily summertime inspired but it is darling and I couldn't resist.  A cute Kitchen Printable by Homemadeinterest
kitchen chalkboard printable


 With the kids home all summer long it wouldn't be surprising for this printable to be fitting all summer long.  A cute little Frozen Printable by Holy-Craft:
frozen movie printable
The Diary of Daves Wife Reminds us to be Awesome every..day...of...the...summer! 
be awesome every day printable


Make sure to stop by this Thursday to this weeks The Creative Exchange Link Party!  Can't wait to see you there!

PS for more printables you can visit my Printable Pinterest Board below:

Follow Bobbie A Vision to Remember's board Printables on Pinterest.


Follow on Bloglovin

S'mores Inspired Recipes and This Weeks Highlights from the Creative Exchange

Thanks to everyone that stopped by this weeks The Creative Exchange Link Party. This week I am going to do the highlights a little differently, because there were so many fun Smore's inspired recipes. So this week the highglights are all about Smore's!

So here are your 20+ Smore's Inspired Recipes for the Unconventional:
20+ unconventional smore's inspired recipes
 Nutter Butter S'mores by Craftsalamode

 Strawberry Dipped S'mores by Little Dove Creations

 Gourmet S'mores by Time for Season

S'mores for the Grownup by Sweet Southern Blue
Plus, make sure to stop by my S'mores Pinterest board for a ton more ideas on making S'mores a little interesting!


And speaking of Pinterest...do you follow the Creative Exchange Link Party Pinterest Board

Follow on Bloglovin

Kids Summertime Fun, The Simple Way

I am all about simplifying life.  As my kids get older (2, 5, 8, & baby due in Sept), my life gets crazier and crazier.  This summer we don't have a single weekend free.  Seriously, we have something scheduled every....single....weekend.  Not to mention keeping up with swimming lessons, dance lessons, and all the other kid activities.  It is driving me CRAZY.


So with all the craziness that summer provides, I like to keep what I can control simple.

This is what our simple summer time fun looks like:

Picking wildflowers

Learning a new talent (for my middle child it has been learning to sew)
PJ Days (when we don't have to leave the house)


Riding bikes


Hanging out with Dad doing stuff Dad likes to do.


Jumping on the Trampoline with water.  This is seriously my girls FAVORITE thing to do.


Eating ice cream, lollipops, or slushies.  Whatever we have access to that day. 


And just plain ol' hanging out, taking in the sun, even in we didn't get out of jammies that day. 


What do you to for fun during the summer that is easy, fun, and simplifies life?

 Follow on Bloglovin

4th of July Sugar Cookie Bars Recipe

For the 4th of July I made this cute little 4th of July Sugar Cookie Bars. They were a huge hit at the 2 different BBQ's that we took it (PS I didn't take the same pan to both places ;)


4th of July Sugar Cookie Bars
Ingredients: 
1/2cup unsalted butter
1 cup sugar
2 large eggs
1 teaspoon vanilla
2 1/2 cups all-purpose flour
1 teaspoon salt
1 teaspoon baking powder

 Cream layer:
1 8 oz bar of cream cheese softened
1 cup powdered sugar
1 teaspoon vanilla
1 Large Tub of Frozen Whip Topping or 1 pint of Heavy Whipping Cream Whipped
1 lb of fresh Strawberries
1 pint of fresh blueberries

Cream butter, sugar, and eggs. Mix in vanilla. with salt and baking powder.  Then slowly add in the flour until the dough separates from the edge of your bowl (I like to use my +NutriMill Bosch Mixers , but doing it in a regular bowl or in a +KitchenAid will also work great)
  
Press the dough in a cookie sheet (like the one pictured).  You might want to spray your hands (and wash them as my mom would STILL remind me.  lol) with some non-stick butter type spray (I like +PAM Cooking Spray personally)
Bake at 375 degrees for 10 minutes or until done.

For the topping: mix the cream cheese, powedered sugar, and vanilla in a bowl, beating until smooth.  Then fold in your whipped cream/whipped topping.  

Spread that over the top of your cooled down bars.  Refrigerate if you won't be using immediately.   Then right before you serve the bars place your fruit in whatever design you desire (I did the American Flag)  

Quick note: I like more topping than bars when I make this recipe, if you think you would like more cookie and less topping ratio then double the bar recipe.  

Dessert ✔️ for the #4theofjuly #bbq. via Instagram http://ift.tt/1qvvBXQ

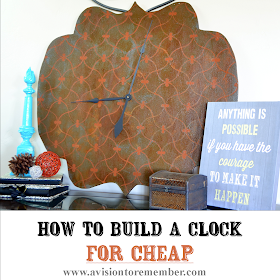
How to Build a Large Clock for Cheap

I am so over my decor in my living room. It is dark, it is beige, and it is boring. No color. Nothing!  I've been needing a change.  Call it nesting, call it summertime fever, call it whatever you want.  I'm bored!  So I decided to build myself a clock.  Something fun, but still going along with my old worldish decor.  Bring a little modern in with it.  My biggest problem is my living room walls are HUGE!  I have cathedral vaults and so it is hard to fill up wall space with a bunch of small frames.  Then it starts to look cluttered.  So I needed a BIG clock.


My other problem is I... AM.... CHEAP!  I hate spending money on decor items.  I worry that in a year I will be bored with it and then where am I?!?

Plus, have you ever looked at buying a clock that is over 2 feet wide?  Lets just say I haven't found one I liked for less than $200, and that one was cheap!

Instead I decided to build myself a clock.

Here is how I did it:

First I found a shape that I liked.  Then I hooked up my trusty ol projector and linked my computer up to it through a VGA cord.  I moved the projector around and fiddled with it until the picture of the shape was the size that I needed.  It measures about 29" x 32".  

Then I used 2 pieces of paper roll (I bought it from Ikea in the kids section, plus they have the cutest little stand for it to go on for the kids to pull out and draw to their hearts content).  Freezer paper would work perfectly, or even newspaper roll ends.  Or even a newspaper for that mater.  Just get something that you can tape together and trace your shape.

This is what the shape looked like after tracing it out and cutting it out.  

A little about the board that I got.  It is particle board from +The Home Depot   It was a 4' x 8' board that cost around $15. This board was the thinnest that they had.  I don't remember the exact measurement, though.  I tried to find something smaller, but there wasn't anything to be had.  Plus, this ended up being cheaper  and lighter than the pine board that I was planning on getting before I went into the store. 

Then I cut the shape out with my handy dandy saw and sanded the edges. 


Prime the board.  This will give you a nice smooth finish to work with, plus then you won't use as much paint.

Paint your first coat.  I used +Modern Masters Iron paint.  My living room color scheme is orange, gray, and black so the Primer for the Iron paint was perfect!  

I will be doing another post on tips and tricks on using the iron paint from my experience so stay tuned for that. 
 

Then lay your stencil out over the top of your board, after your first coat of paint has dried. I used a sponge to paint the gray/black color on.  

I didn't care if I got nice crisp lines because I wanted a weathered/old world look to my clock.  But if you want nice clean crisp lines I would HIGHLY recommend using spray adhesive so that your stencil will stick down good and not let paint seep underneath it.   

The stencil I used is called Curved Connection Moroccan Stencil from +Royal Design Studio Stencils (you can also go to their Royal Design Studio Website).  They have 2 different sizes in this stencil (and a ton of other stencils to choose from).  I seriously am in love with this stencil design!  

On another side note, they have a bunch of info on their website if you are wanting to learn how to stencil.  It is seriously full of great info. 
 

That is really all you need to do if you are doing 2 different colors of paint.  Because I was using the iron paint I needed to do a layer of acid stuff to give the textured look, and then a sealer layer as well.  That is where the shiny look came in.  I love the shiny, but it was definitely not fun to try to photograph.

Then I followed the directions on installing the clock hands.  I bought this clock hand set on +eBay .  The largest hand measures 12".  It is also called a high torque clock kit so you know what to search for.  

I think installing the clock hands was the easiest part of the entire job!


I am seriously so in love with how it came out.  A little old world, meets a little new world.

The next step for me is to figure out what to do for numbers on the clock.  I am thinking a matte vinyl, and I am trying to bring in a little turquoise in the room for brightness, but not completely sold on the idea.  Hence the no numbers on the clock just yet.    Stay tuned for part 2 and 3.  How to cut the numbers for the clock and how to paint with the iron paint. 


Follow on Bloglovin