▼
Free Pattern: Ragged Receiving Blanket Pattern
Click on the picture above to download your free pattern for the Ragged Receiving Blanket Pattern by A Vision to Remember


Happy Easter! #becauseofhim
My heart is so full right now! I am so very grateful for Easter and the great reminder it is of our Savior, Jesus Christ, and what he did for us.
I am so grateful that he died for me and was resurrected so that I can be resurrected too! I am so grateful that I get to be a part of a forever family because of Jesus. Without him death would be the end and with him I get the eternities.
That brings me to my family. I love them so very much and want to be with them ALWAYS, and that is possible because of Christ and his love for me. He died on that cross for me and I will forever be grateful for what he did.
I love this video...if you want to take a few minutes to watch it. It is about Christ and what Easter Really means.
If you would like more information and to read a condensed version of The Easter Story with your family (or by yourself ) Go to Mormon.org
Or check
+Mormon Channel
+The Church of Jesus Christ of Latter-day Saints
+Mormon.org

Scallop Seaside Shorts Pattern Review
I had the opportunity test the Seaside Scallop Shorts by Peek-a-Boo Pattern Shop over the weekend.
I was so excited to finally be picked to test one of Amy's patterns. I have several of them and love Ever Single One of Them!
This pattern did not disappoint. (neither did my little girl during our mini photo shoot) She cracks me up!
 So if you would like to buy your own pattern it is on sale for 15% off today for its release.
So head on over and get your pattern today!
I was so excited to finally be picked to test one of Amy's patterns. I have several of them and love Ever Single One of Them!
This pattern did not disappoint. (neither did my little girl during our mini photo shoot) She cracks me up!
 So if you would like to buy your own pattern it is on sale for 15% off today for its release.
So head on over and get your pattern today!
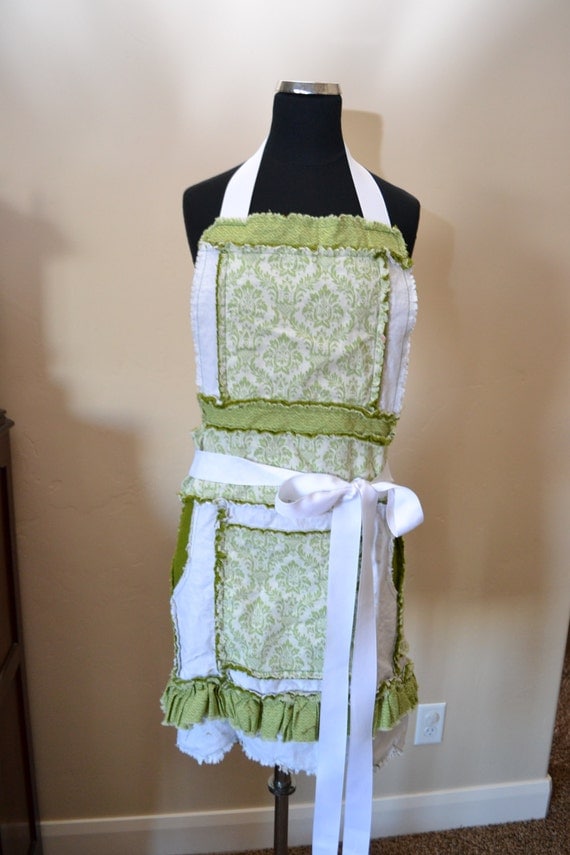
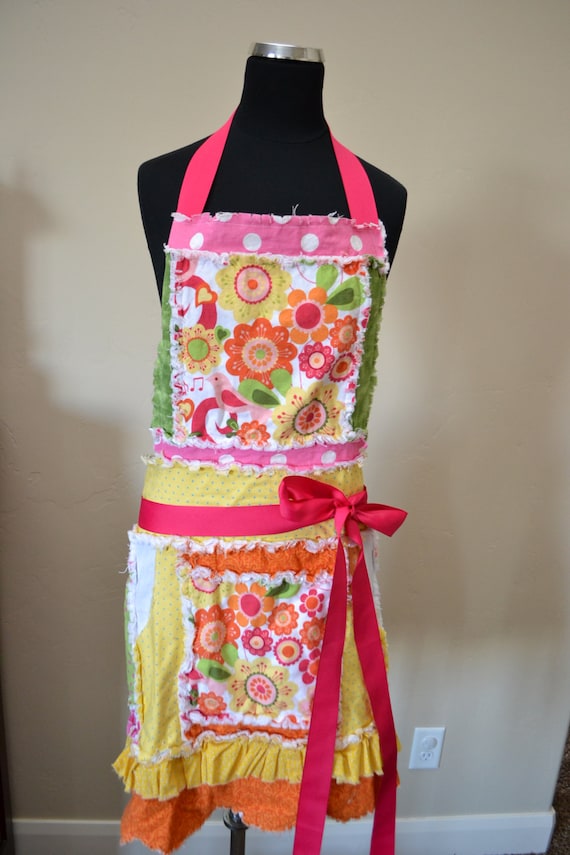
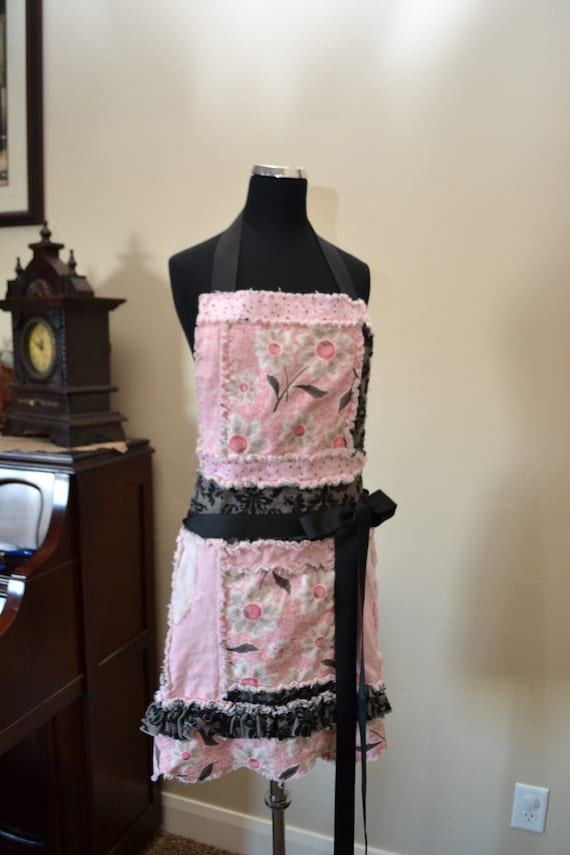
Mothers Day Gift Idea: Rag Apron
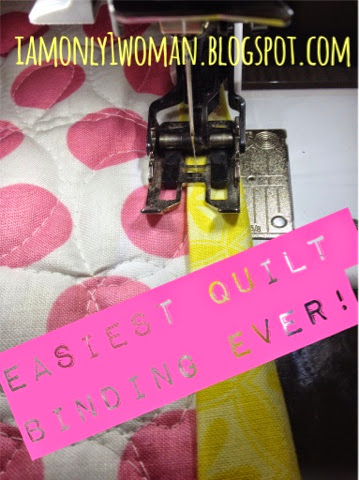
Easiest Quilt Binding Method EVER! Binding a Quilt with Clear Thread
I don't know about you, but after I have sewn together a quilt top, then basted, and finally quilted a quilt, the last thing I want to do is sit with a needle and thread and hand sew binding onto the quilt.
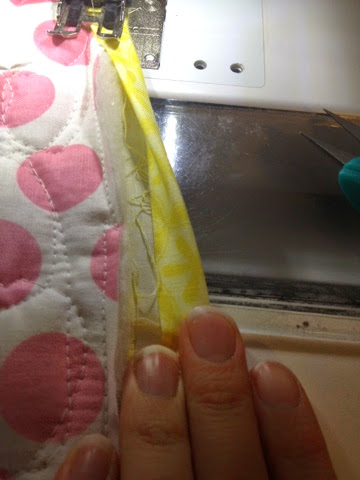
So here is my method for binding a quilt with no hand sewing required, just your regular ol sewing machine, a walking foot, and clear thread are all you need!
How to Sew a Ruffle Valance:
So here is my method for binding a quilt with no hand sewing required, just your regular ol sewing machine, a walking foot, and clear thread are all you need!
For more info on the type of machine I use and recommend head on over to our blog post
I first sew my binding onto the quilt like you would normally.
Then change your thread to clear thread in both the top thread and the bobbin. Fold your excess binding over and hid it under your exposed binding and then sew as close to the edge as possible.
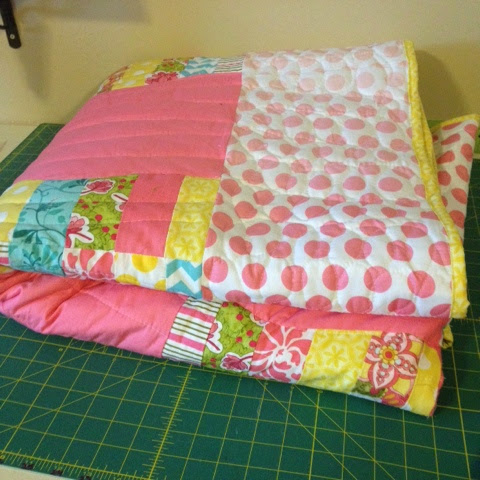
and Voila! You have a beautifully bound quilt, without a ton of hand sewing!
You might also like:
How to add Minky to the Back of a Quilt:
How to Sew a Ruffle Valance:
Craft Room Reveal
Today as part of the Craft Room Tour, hosted by Angie with the Country Chic Cottage, I am sharing with you all my sewing room.
I have shared bits and pieces of it over the last couple years, but never a tour of it.
But here is the official tour. Don't be alarmed that it isn't spring cleaned. This is just the way I work. With piles...piles in every corner. Piles in all those cupboards. Piles of to-do, piles of mending, piles of "I don't know where to put that". Just piles.
I am ok with piles. Its an organized chaos that I enjoy.
So lets just dive in:

This is my daughters sewing station. She is 8 and loves being able to sew on my very first machine that I owned. That chair was given to me when I still lived at home, but I reupholstered it with my mom's help last year.
Both my daughter and I have the EXACT same sewing table. Mine is for my serger, and I painted mine pink (which is my fav color) and hers is blue for the same reason :)
Whenever someone comes into my sewing room they ask me if I use ALL of the machines. It makes me giggle inside, but yes I do.
The serger (on the left), I use for serging and finishing all my edges.
The bernina (the one looking straight on) was a gift from my awesome husband. I was so mad at him for spending the money on it when he did, but I haven't complained a day since then. I love that machine. It does all my delicate sewing.
The Juki (its the one on the right) is an industrial sewing machine. It sews light weight to medium weight fabric. It is REALLY fast. My Bernina sews around 1000 stitches per minute and the Juki Sews 5500 stitches per minute. It was a little intimidating at first to sew with, but now I LOVE that machine!
The cute rolling chair my mom found at Goodwill last year for $3. It was in really rough shape. My awesome Father in Law took the metal parts and sand blasted them and then powder coated them for me. My mom and I did the Reupholstery
The little plastic drawers hold all my thread and bigger sewing things that I need close by while sewing. Not pretty, but definitely do their job!
For my cutting table I use a regular ol' 6" folding table. I found the bed risers from +Jo-Ann Fabric and Craft Stores a few years ago around back to school time. I LOVE having my table sitting up higher so that I don't have to bend over as I cut. Especially when I am stand at that table for hours upon end. For more information on the cutting table go to HERE
The plastic drawers hold smaller pieces of fabric, separated by the type of fabric. The top right corner holds all my patterns. The little cupboard mostly is used as a place to stack and pile stuff (inside and out :)
The little shelf above the table (I have another one to put next to it with an iron holder thing I bought from +IKEA USA that I just haven't had the time to put up yet) holds all my scissors, rulers, rotary blade and pieces of scraps that I am saving. Don't you love the little Chevron buckets from Pick Your Plum?!?
This little area is my newest addition. It is strictly an embroidery machine. The cupboard and drawers hold stuff for embroidery.
All of those little shoe box containers have fabric scraps organized by color and size. the bottom row of fabrics are all minky, ruffles, home decor weight fabric, and clothing type fabrics.
I almost always have some project out on the floor. Both of those are custom orders that I am working on right now for my Etsy shop
The top row of fabric is mostly cotton prints, but there are a few flannel prints up there as well. I love having fabric on hand for my Etsy shop instead of running to the fabric store all the time. I also sell most of it in my Etsy shop if you wanted to take a peak
The bottom fabrics are either solid flannel that I use on the rag quilts that I sew or ruffle fabrics for curtains for the ol' Etsy Shop
Thanks so much for stopping by and checking out my sewing room! The next stop on the tour is A little Craft in Your Day


I have shared bits and pieces of it over the last couple years, but never a tour of it.
But here is the official tour. Don't be alarmed that it isn't spring cleaned. This is just the way I work. With piles...piles in every corner. Piles in all those cupboards. Piles of to-do, piles of mending, piles of "I don't know where to put that". Just piles.
I am ok with piles. Its an organized chaos that I enjoy.
So lets just dive in:

This is my daughters sewing station. She is 8 and loves being able to sew on my very first machine that I owned. That chair was given to me when I still lived at home, but I reupholstered it with my mom's help last year.
Both my daughter and I have the EXACT same sewing table. Mine is for my serger, and I painted mine pink (which is my fav color) and hers is blue for the same reason :)
 |
| How to store fabric on Mini bolts |
Whenever someone comes into my sewing room they ask me if I use ALL of the machines. It makes me giggle inside, but yes I do.
The serger (on the left), I use for serging and finishing all my edges.
The bernina (the one looking straight on) was a gift from my awesome husband. I was so mad at him for spending the money on it when he did, but I haven't complained a day since then. I love that machine. It does all my delicate sewing.
The Juki (its the one on the right) is an industrial sewing machine. It sews light weight to medium weight fabric. It is REALLY fast. My Bernina sews around 1000 stitches per minute and the Juki Sews 5500 stitches per minute. It was a little intimidating at first to sew with, but now I LOVE that machine!
The cute rolling chair my mom found at Goodwill last year for $3. It was in really rough shape. My awesome Father in Law took the metal parts and sand blasted them and then powder coated them for me. My mom and I did the Reupholstery
The little plastic drawers hold all my thread and bigger sewing things that I need close by while sewing. Not pretty, but definitely do their job!
For my cutting table I use a regular ol' 6" folding table. I found the bed risers from +Jo-Ann Fabric and Craft Stores a few years ago around back to school time. I LOVE having my table sitting up higher so that I don't have to bend over as I cut. Especially when I am stand at that table for hours upon end. For more information on the cutting table go to HERE
The plastic drawers hold smaller pieces of fabric, separated by the type of fabric. The top right corner holds all my patterns. The little cupboard mostly is used as a place to stack and pile stuff (inside and out :)
The little shelf above the table (I have another one to put next to it with an iron holder thing I bought from +IKEA USA that I just haven't had the time to put up yet) holds all my scissors, rulers, rotary blade and pieces of scraps that I am saving. Don't you love the little Chevron buckets from Pick Your Plum?!?
This little area is my newest addition. It is strictly an embroidery machine. The cupboard and drawers hold stuff for embroidery.
All of those little shoe box containers have fabric scraps organized by color and size. the bottom row of fabrics are all minky, ruffles, home decor weight fabric, and clothing type fabrics.
I almost always have some project out on the floor. Both of those are custom orders that I am working on right now for my Etsy shop
The top row of fabric is mostly cotton prints, but there are a few flannel prints up there as well. I love having fabric on hand for my Etsy shop instead of running to the fabric store all the time. I also sell most of it in my Etsy shop if you wanted to take a peak
The bottom fabrics are either solid flannel that I use on the rag quilts that I sew or ruffle fabrics for curtains for the ol' Etsy Shop
Thanks so much for stopping by and checking out my sewing room! The next stop on the tour is A little Craft in Your Day

Sewing Yoga Girl Pants
Wholeport sent me some knit fabric to do something with. It is really cute, but really boyish.
Which shouldn't be a problem, but I live in a house full of girls. When I opened the package (because its a total surprise what they would be sending) I thought "oh crap. How am I going to get my girls to wear this fabric." Thankfully, they aren't total girly girls
 |
| Photobombing courtesy of our Miss Lilly the Boxer |
All 3 of my girls just went through growth spurts so they are needing more lounge pants. I used the Ananda Pants pattern from Chopstix Patterns. It seriously is the easiest and best fit yoga pants that I have sewn. My girls love them...I wish I had my own pair!
So the consensus is, that even my pickiest middle child approves!
I made 3 pairs of these pants in under an hour. Seriously the quickest and easiest thing ever!
Sadly, baby girl was still sleeping so she missed out on the mini photo shoot.

Quick and Easy Girl Twirl Skirts with PDF Download
Let me just start by say that I might just be the only person that LIKES church at 1 pm on Sunday. It gives me time to do things I wouldn't normally do during the week that I REALLY like to do.
For example....paint my toes (and all 3 girls). I don't have the time or the energy during the week to do it, but because I have time to kill Sunday morning, I am able to take a little Me Time.
This Sunday morning was no different as we sat and listened to +KLCE Classy 97 and the Sounds of Sunday. The girls asked me if I could make them new dresses for church.
Of course I can, but how do you make 3 little girls dresses, in under an hour?
Make them a twirl skirt with a wide elastic waistband. Super Simple. Super Quick. But Most Importantly....Super Cute!
Of course, I was in such a hurry so I didn't take any pictures. Sorry!
But seriously they are so easy to do that you will be making a million of them in no time.
I made this little infograph with the information for you to make your own. They seriously are so simple! If you would rather the PDF version you can go HERE to download it
Aren't my girls just the cutest! Seriously, in love with these 2.









.JPG)
.JPG)