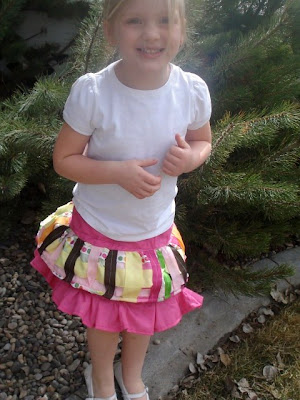
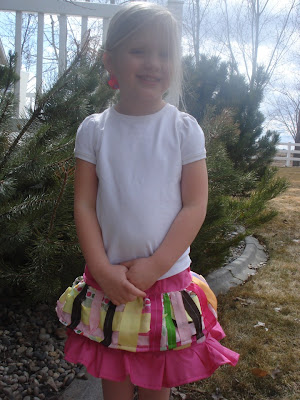
Isn't she just adorable?!?
 This skirt can be as complicated or simple as you would like. All I did was copy a skirt that my daughter has. I made the waist band 4 inches wide.
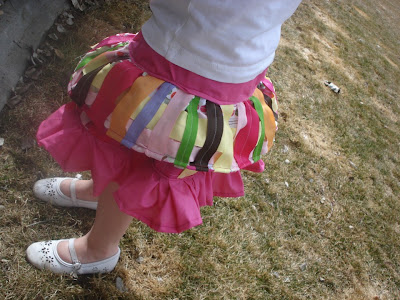
 It also has a cute little ruffle
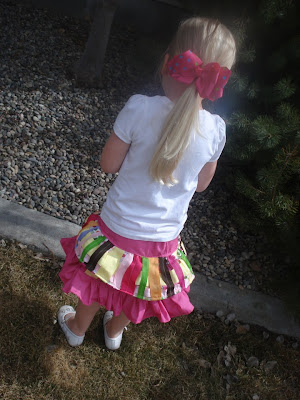
 The backside of the skirt
 The skirt is even made of 2 layers.
Instructions for making the ribbon fabric:
- Take the main body part of your skirt and randomly sew ribbon onto the fabric. I used a ton of scrap ribbon that I had from other projects. I sewed on 3 layers of ribbon. The top layer was random small pieces of ribbon that I used steam a seam (1/4 inch) and ironed them onto the fabric so that they would not move while I was sewing them.
- The next layer of ribbon I sewed them all in a straight line horizontally.
- The third and last layer of ribbon I sewed the ribbon all vertically onto the fabric.
- Now between 80-90% of the fabric is covered with ribbon. You don't have to do this much ribbon. If you want, pin the ribbon onto the fabric in the pattern that you are wanting and then sew the ribbon that way.
- Now trim off the extra ribbon that is hanging over the edge of the fabric.
- Sew the skirt together following the directions for your favorite skirt pattern or follow the direction below:

Here is how to make your skirt for a little girl:
- Measure the waist of whoever the dress will fit. My daughters is 21 inches.
- Divide that number by 2, then add .5 (this is for your seam allowance so add what you need). So now I have 11 inches. This is how long you need your front "yoke" (that is the front part of the waistband)
- Now take the other half of the number (21 in my case) which is 10.5 and add 1-2 inches. This is going to be for the back part of the yoke. You want this part to have a little bit of give so that the skirt can stretch over the bootie (or hindy). Then add your seam allowance again. So my new number for the back yoke is 13 inches.
- Now decide how tall you want your waistband. I wanted mine 3 inches tall.
- For the front yoke take your number and add .5 inches again for the seam allowance. My new number is 3.5
- For the back yoke you need to add room for your elastic waistband. So you need to add 1 extra inch (I used 1/2 inch wide elastic). then add .5 for your seam allowance. My new number is 4.5
- Now for the skirt part: take your first magic number (21 for me) and double it. So now I have 42.
- Now for the height: I wanted to do 2 layers for the skirt and I wanted them to be about 4 inches tall. So to make it easier while sewing the ribbon onto the skirt I did 1 panel and sewed on all the ribbon and then cut that panel into the skirts. So my panel ended up being 10 inches tall (8 for both skirt layers plus .5 and plus .5 twice for the seam allowances)
- For the ruffle you take your length for the skirt part and times it by3 it again (my number is 132)
- I wanted my ruffle about 2 inches wide (so 2.5 for me)
- Now for the cutting part: Cut out 2 front yokes (mine are 3.5x11 inches) and 1 back yoke (13x4.5). Cut your skirt piece (mine was 10x42), Cut your ruffle (I needed 132 inches of 2.5 inch wide strips of fabric so I cut 3 2.5 inch strips out of my fabric and then sewed them into one long strip), and cut a piece of elastic the same length as your waist measurement divided by 2 (in my case it is 10.5
- Now sew the 2 front yokes together, turn then, then iron the piece flat.
- Take your back yoke and finish the top edge, then turn it over .5 inches and sew it down to create the place for your elastic to be threaded through.
- Now take your skirt piece and cut it into the correct sizes (I now have 2 42x4.5 inch pieces.
- Sew along the 4.5 inch side to create a circle. Repeat with the 2 skirt piece
- Lay the pieces so that the ribbon side is facing you and then sew around the top part of them (the 42 inch side).
- Thread the elastic through the back yoke. Make sure to not loose it inside the yoke
- Now sew the front and back yoke pieces together to form a circle. Make sure to sew the elastic while you are doing this.
- Now sew the ruffle into a circle
- Sew the yoke piece to the skirt piece. And then sew the ruffle piece onto the skirt.
- Now you have a unique, adorable ribbon skirt.


.png)
15 comments:
Hey. I gave you an award!
http://www.houseofhepworths.com/2010/04/02/my-first-award/
Bobbie - my girls would love that skirt!!!Cute - I'd like to invite you to come "plant your creative seed" at my blog party "Plant a Punkin Seed at Punkin Seed Productions". It's a party that usually happens on Fridays but its open all this week as I'm having a give away! Come sign up!
Kristi
Punkin Seed Productions
That is so cute. I love the ribbons. My girls would love that!
XOOX
Jen
What a darling little skirt! Thanks so much for sharing!
So cute! I love the idea of using ribbon, it gives it so much character!
Absolutely darling. Hope you'll come by Atticmag for our really useful giveaway. -- Jane F.
Cute - thanks for sharing the how-to. I am having my first linky party tomorrow (tuesday) and would love to have you link-up: www.craftedition.blogspot.com
Love the skirt screams cuteness LOL
Oh and i LOVE your blog so glad i found you on tip junkie got yourself another follower :)
Mayya @ Sew Chic and Unique
www.sewchicandunique.com
Wow!! I love it!! Thanks for linking @Creative Itch's "Sew Cute Tuesday"!!
I LOVE this, love it! You should see my ribbon collection- out of control would be the best way to describe it!
Thanks for linking up to our Friday Fun Find party- we'd love to have you again. :)
Ok- that is just too cute for words! Love it!
So, So Cute!! My little one would LOVE wearing one of these skirts!
Jenn
This is SOOO darling!! What a cute idea. Wish I had a girl to dress up in it!! I just found your blog and I love that you have a Saturday linky party. I'll have to link up!! Found you on New friend Friday. Love your blog and nice to meet ya!!
Alison
http://oopsey-daisy.blogspot.com/
That is the cutest skirt I have ever seen! What a great job, so unique! I followed you here from NFF, I'm off to take a look around!
Super cute!! I may have to make one of these soon. :) Thanks for sharing.
Blessings!
-Sarah
Post a Comment
I love hearing from you! Let me know what you think